
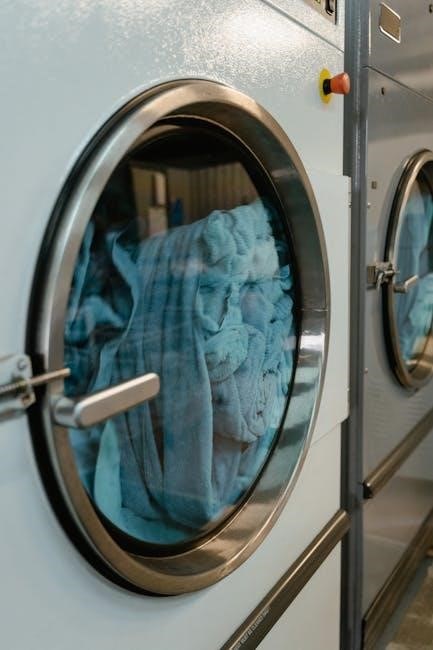
Integrated washing machines offer a seamless kitchen design, concealing the appliance behind a cabinet door․ Hoover models feature smart technology and silent operation, ensuring efficient laundry solutions․ Proper door fitting is essential for functionality and aesthetics, requiring precise alignment and secure hinges for smooth operation․
Overview of Integrated Washing Machines
Integrated washing machines are designed to blend seamlessly into kitchen interiors, concealed behind a cabinet door for a sleek, modern appearance․ Hoover models, in particular, are known for their slim designs and advanced features, making them ideal for space-efficient kitchens․ These machines are typically built-in, requiring precise installation to ensure proper alignment with surrounding cabinetry․ The door fitting process is crucial, as it must align perfectly with the washing machine’s frame to maintain a cohesive look․ Hoover integrated washing machines often feature silent operation, energy efficiency, and smart technology for optimal performance․ They are designed to handle various fabric types and offer customizable wash cycles, catering to diverse household needs․ Proper installation ensures longevity and functionality, making integrated models a practical choice for modern homes․
Benefits of Integrated Models
Integrated washing machines, such as those from Hoover, offer numerous benefits, including a sleek, space-saving design that enhances kitchen aesthetics․ By concealing the appliance behind a cabinet door, they maintain a uniform look, ideal for modern interiors․ These models are typically quieter and more energy-efficient, reducing noise pollution and lowering utility bills․ Hoover integrated washing machines also feature advanced technologies like smart controls and multiple wash cycles, providing convenience and customization․ The seamless integration with kitchen cabinetry ensures a clean, clutter-free environment․ Additionally, proper door fitting prevents dust accumulation and ensures smooth operation․ Overall, integrated models are a practical choice for homeowners seeking functionality, style, and efficiency in their laundry setup․

Preparing for Installation
Gather necessary tools and materials, ensure the installation area is clear, and review the manual for specific instructions․ Verify all components are included and undamaged before starting․
Necessary Tools and Materials
To ensure a smooth installation, gather the following tools and materials: a drill with drill bits, measuring tape, spirit level, screwdrivers (both Phillips and flathead), and Allen keys․ Additionally, you will need wall brackets, screws, hinges, and spacers as provided with the Hoover integrated washing machine․ Ensure all components from the installation kit are present, including door alignment pins and mounting hardware․ It is also advisable to have a pencil for marking pilot holes and a rubber mallet for tapping parts into place gently․ Refer to the instruction manual for any model-specific tools or materials required․ Organizing these items beforehand will save time and prevent delays during the fitting process․
Safety Precautions and Guidelines
Before starting the installation, ensure the washing machine is switched off and unplugged from the power supply․ Always disconnect the appliance before handling internal components․ Verify that the door is unlocked to avoid accidental start-ups․ Use protective gloves and eyewear when drilling or handling sharp materials․ Ensure the floor is clear of clutter to prevent tripping hazards․ Avoid overloading the machine or applying excessive force, which could damage the hinges or alignment․ Proper ventilation in the room is essential to prevent moisture buildup․ Keep children and pets away during the installation process․ Follow the manufacturer’s guidelines for weight limits and structural integrity․ Consult the Hoover manual for specific safety recommendations tailored to your model․ Safety should always be the top priority to avoid accidents and ensure a secure installation․

Understanding the Door Mechanism
The door mechanism ensures smooth operation and proper sealing․ Hinges and alignment are critical for even weight distribution and silent functioning, enhancing overall performance and durability․
Door Hinges and Alignment
Proper hinge alignment is crucial for smooth door operation․ Attach hinges to the washing machine and cabinet door, ensuring they are level and evenly spaced․ Use pilot holes to avoid damaging surfaces․ Align the door with mounting brackets, securing it firmly․ Adjust hinges as needed for perfect fitment․ Proper alignment prevents door sagging and ensures silent operation․ Follow manufacturer guidelines for precise adjustment․ Misaligned hinges can cause noise and wear, so double-check fitment before final tightening․ This step ensures longevity and optimal performance of your integrated washing machine door․
Importance of Proper Door Fitting
Proper door fitting is essential for the seamless integration and functionality of your Hoover washing machine․ A well-fitted door ensures the machine operates quietly, reduces vibration, and maintains energy efficiency․ Misalignment can lead to noise, water leakage, and increased wear on hinges․ Correct fitting also prevents damage to surrounding cabinetry and ensures safe operation․ Proper alignment guarantees the door seals effectively, maintaining optimal washing performance․ Incorrect installation can void warranties and lead to premature repairs․ Always follow Hoover’s fitting instructions to achieve a flawless installation․ Proper door fitting enhances both the aesthetic appeal and longevity of your integrated washing machine, ensuring years of trouble-free service․ It is a critical step that directly impacts performance, safety, and overall satisfaction with your appliance․
Step-by-Step Installation Guide
Attach mounting brackets to the washing machine front, align the cabinet door with the brackets, mark and drill pilot holes, then secure the door firmly in place for a precise fit․
Attaching Mounting Brackets
Mounting brackets are essential for securing the integrated washing machine door․ Begin by attaching the brackets to the front of the washing machine, ensuring they align with the pre-drilled holes․ Tighten the screws firmly to prevent any movement․ These brackets serve as the base for the door hinges, so proper installation is crucial for smooth operation․ Once the brackets are securely in place, you can proceed to align the cabinet door, ensuring a seamless integration with your kitchen design․ Always refer to the Hoover instruction manual for specific measurements and torque specifications to guarantee a stable and durable fit․
Aligning the Door with Brackets
Aligning the cabinet door with the mounting brackets is a critical step for proper installation․ Hold the door against the brackets, ensuring it is flush and evenly spaced․ Use a spirit level to verify the door’s alignment, making sure it is perfectly horizontal and vertical․ Check the door’s position from multiple angles to ensure accuracy․ Proper alignment ensures smooth operation and prevents issues like uneven closing or poor sealing․ Once satisfied with the alignment, proceed to mark the screw holes for drilling․ Double-checking the alignment before securing the door will help avoid installation errors and ensure a professional finish․ This step requires patience and attention to detail to achieve a seamless integration with your kitchen design․
Drilling Pilot Holes
Drilling pilot holes is a crucial step to ensure secure and accurate fitting of the integrated washing machine door; Using a small drill bit, carefully create pilot holes at the marked positions where the screws will go․ This prevents the material from splitting and ensures a precise fit․ Align the drill with the marked screw locations on the door and brackets, maintaining steady pressure to avoid misalignment․ Use a spirit level to confirm the holes are straight and level․ After drilling, inspect the holes to ensure they match the screw positions exactly․ Cleaning the area of debris before proceeding ensures a smooth installation process․ Properly drilled pilot holes are essential for securing the door firmly and achieving a professional finish․
Securing the Door
Securing the door involves carefully fastening it to the mounting brackets using the provided screws․ Ensure the door is aligned properly before tightening to prevent misalignment․ Tighten the screws evenly to maintain stability and avoid warping the door frame․ Once secured, test the door by opening and closing it to ensure smooth operation and proper sealing․ Double-check that the door stays closed when not in use to maintain the integrated design․ Avoid over-tightening, as this could damage the hinges or surrounding material․ If unsure about the process, consider consulting a professional for assistance․ Properly securing the door ensures durability and optimal performance of the integrated washing machine, maintaining both functionality and aesthetics․
Adjusting Hinges for Proper Alignment
After securing the door, adjust the hinges to ensure proper alignment․ Loosen the hinge screws slightly and gently maneuver the door to align it with the cabinet frame․ Tighten the screws once the door is in the correct position․ Check the door’s movement to ensure it opens and closes smoothly without catching or misaligning․ If the door sags or tilts, adjust the hinges accordingly by loosening or tightening the screws as needed․ Proper alignment ensures the door functions seamlessly and maintains the integrated design․ Fine-tune the hinges to achieve a flush fit with the surrounding cabinetry for a polished look․ Verify alignment by opening and closing the door multiple times to confirm stability and even movement․
Final Checks and Adjustments
Once the door is secured and hinges are aligned, perform a thorough inspection to ensure everything functions correctly․ Open and close the door multiple times to check for smooth operation and proper sealing․ Verify that the door aligns evenly with the cabinet frame and does not leave gaps․ Double-check that all screws and hinges are tightened securely to prevent any movement or instability․ If necessary, make minor adjustments to the hinges or door position for a flush fit․ Finally, test the door’s opening and closing mechanism under load to ensure it remains stable and evenly aligned․ This step ensures the integrated washing machine door operates seamlessly and maintains a polished appearance․

Post-Installation Tips
Regularly clean the door seals and hinges to maintain hygiene and smooth operation․ Ensure the door aligns perfectly with the cabinet frame for a seamless look․ Lubricate hinges periodically to prevent squeaking and ensure smooth movement․ Check for proper door closure to avoid energy waste and noise during operation․ Schedule routine maintenance to keep the integrated washing machine door functioning optimally and extend its lifespan․
Maintenance and Cleaning
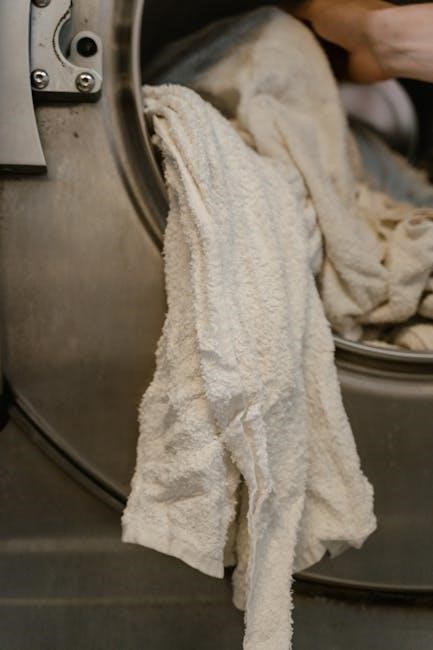
Regular maintenance ensures optimal performance and longevity of your Hoover integrated washing machine door․ Clean the door seals and hinges periodically to prevent dirt buildup and mold growth․ Use a soft cloth and mild detergent to wipe down surfaces, avoiding harsh chemicals that may damage finishes․ Check the door alignment and adjust if necessary to maintain proper closure․ Lubricate hinges every six months to ensure smooth operation․ Inspect the door fittings and tighten any loose screws․ For stubborn stains or odors, mix equal parts water and white vinegar on a cloth and gently scrub․ Avoid abrasive materials that could scratch the surface․ Refer to your Hoover manual for specific cleaning recommendations tailored to your model․
Troubleshooting Common Issues
If your Hoover integrated washing machine door doesn’t align properly, check the hinges and brackets for loose screws or misalignment․ Ensure the door is securely attached and adjust the hinges as needed․ If the door doesn’t close smoothly, inspect for obstructions or debris․ Lubricate hinges if they feel stiff or creaky․ For uneven gaps, refer to the fitting instructions to realign the door․ If issues persist, consult the user manual or contact Hoover support for assistance․ Regular maintenance and proper installation are key to preventing these common problems and ensuring your integrated washing machine operates efficiently․

Common Mistakes to Avoid
Incorrect hinge alignment and improper pilot hole drilling are common mistakes․ Ensure precise measurements and follow instructions to avoid misfitting the door and causing operational issues․

Alignment Errors
Alignment errors are a common issue during installation, often leading to uneven door closure or improper fit․ Misaligned hinges can cause the door to sit crookedly, affecting both functionality and appearance․ To avoid this, ensure the hinges are properly aligned with the mounting brackets before securing them; Use a spirit level to verify that the door is straight and evenly positioned․ If the door is not aligned correctly, it may not close smoothly, potentially causing damage to the seal or hinge over time․ Always double-check the alignment before drilling pilot holes or securing screws․ For complex cases, consult the Hoover manual or seek professional assistance to ensure precise fitting and optimal performance․ Proper alignment is crucial for the door to function quietly and efficiently․
Drilling Mistakes
Drilling mistakes can compromise the stability and alignment of the integrated washing machine door․ One common error is drilling pilot holes in the wrong location, which can lead to misaligned screws and uneven fitting․ Always use the provided templates or markings from the manufacturer to ensure accuracy․ Another mistake is using the wrong drill bit size, which can cause the screws to loosen over time or damage the surrounding material․ Additionally, applying too much pressure while drilling can result in splintered surfaces, especially on delicate materials․ To avoid these issues, mark the drilling spots clearly, use a steady hand, and drill slowly․ For the hinge side, ensure the holes are precisely aligned to maintain proper door movement․ Always double-check the measurements before drilling to prevent costly repairs․ Consulting the Hoover manual or a professional can help mitigate these risks․ Proper drilling techniques are essential for a secure and balanced installation․

Advanced Tips for Optimal Performance

Ensure proper door alignment for energy efficiency and quiet operation․ Regularly clean hinges and check balance for smooth running․ Enable silent mode for noise reduction during cycles․
Ensuring Quiet Operation
For a Hoover integrated washing machine, proper door alignment is key to minimizing noise․ A snug fit prevents rattling and vibrations during cycles․ Regular hinge cleaning and lubrication can reduce operational noise․ Using silent mode settings helps lower decibel levels․ Additionally, ensuring the machine is level and balanced prevents vibrations, contributing to quieter operation․ Proper door fitting and secure hinges minimize gaps that could allow noise to escape․ Regular maintenance, such as cleaning the gasket and ensuring a tight door seal, also helps maintain quiet performance by preventing leaks and mold buildup․ Proper installation and consistent upkeep are essential for optimal noise reduction and overall machine efficiency․
Maximizing Energy Efficiency
To maximize energy efficiency with your Hoover integrated washing machine, ensure the door is properly fitted to prevent heat loss and maintain optimal performance․ Proper door alignment and sealing reduce energy consumption by preventing leaks and ensuring efficient operation․ Regularly cleaning the door gasket and hinges helps maintain a tight seal, which is crucial for energy-saving modes․ Using eco-mode settings and lower temperature cycles can significantly reduce energy usage․ Additionally, ensuring the machine is balanced and level prevents excessive vibration, which can strain the motor and increase energy consumption․ Proper door fitting also ensures the machine runs quietly, reducing overall energy demand․ By following these steps, you can enjoy both energy efficiency and quiet operation from your Hoover integrated washing machine․
For further assistance, visit Hoover’s official website to download detailed manuals and guides for integrated washing machine door fitting․ Explore troubleshooting tips and energy-saving advice for optimal performance․
Final Thoughts on Installation
Installing the integrated washing machine door requires patience and attention to detail․ Ensure all brackets are securely attached and the door aligns perfectly with the machine․ After installation, test the door’s operation to confirm smooth opening and closing․ Proper installation prevents future issues like misalignment or noise․ Refer to the Hoover manual for specific guidelines, and consider seeking professional help if unsure․ Regular maintenance will extend the appliance’s lifespan and ensure optimal performance․ By following these steps, you’ll achieve a seamless integration that enhances your kitchen’s functionality and appearance․
Accessing Manuals and Support
To ensure a smooth installation process, refer to the official Hoover integrated washing machine door fitting instructions․ Manuals are available for download on the Hoover website in PDF format, searchable by model and product code․ If you encounter issues, contact Hoover’s customer support for assistance․ Additionally, authorized service centers can provide professional help for complex installations․ Always use genuine Hoover parts and accessories for optimal performance․ Regularly check the website for updates or additional resources․ Proper guidance ensures a flawless installation, maintaining both functionality and design integrity․ By leveraging these resources, you can resolve common issues and achieve a professional-quality fit for your integrated washing machine door․